React Native基础:17-TabBarIOS组件
TabBarIOS组件简介
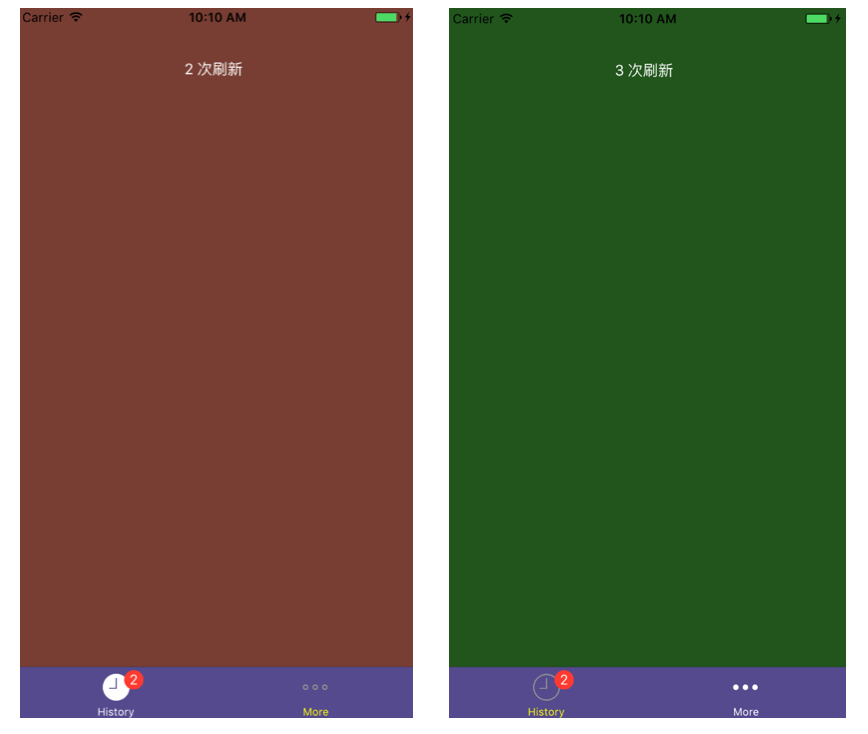
TabBarIOS组件通常显示在手机屏幕的底部,在应用程序中,通过TabBarIOS组件可以在不同功能页面之间进行切换。在React Native中,提供了两个用于页面间跳转的组件,一个是Navigator组件,另一个就是TabBarIOS组件。我们可以对TabBarIOS组件的外观进行设置,包括是否透明、背景色、选中标签的颜色等。一个TabBarIOS组件上会有多个标签(Item),每个标签可以在右上角显示一个红色的数字(Badge)。需要注意的是,在React Native中带IOS或Android后缀的组件,都不能跨平台运行,例如TabBarIOS组件就只能够在iOS平台使用。

TabBarIOS组件中提供了如下几个属性可以用于定制TabBar的样式。
|属性名称|类型|说明|
|---|---|---|
|barTintColor |string |标签栏的背景颜色。|
|tintColor |string |当前被选中的标签图标的颜色。|
|unselectedItemTintColor |string |当前没有被选中的标签图标的颜色(仅在iOS 10及以上版本有效)|
|translucent |bool |决定标签栏是否需要半透明化。|
TabBarIOS.Item
TabBarIOS上的每个标签都是TabBarIOS.Item类型的组件,因此我们可以根据应用程序的需要来定制每个标签的样式和行为属性。例如,我们可以定制标签的图标或者是监听某个标签被用户点击的动作,从而可以对显示的界面进行切换。
TabBarIOS.Item中提供了如下一些常用属性和方法用于定制每个标签的样式和功能。
|属性名称|类型|说明|
|---|---|---|
|badge |string, number |在图标右上角显示一个红色的气泡。|
|icon |Image.propTypes.source |给当前标签指定一个自定义的图标。如果定义了systemIcon属性, 这个属性会被忽略。|
|title |string |在图标下面显示的标题文字。如果定义了systemIcon属性,这个属性会被忽略。|
|selected |bool |这个属性决定了子视图是否可见。|
|onPress |function |当此标签被选中时调用。|
示例代码
下面的示例代码中,创建了一个TabBarIOS组件,有两个标签History和More。通过点击标签可以切换界面的显示内容,并且点击History标签可以更新标签上的Badge数字。
- 在终端中执行如下命令,创建TabBarIOSDemo工程;
react-native init TabBarIOSDemo
- 使用Atom打开工程的index.ios.js文件,编写组件所使用的样式。
const styles = StyleSheet.create({
  tabContent: {
    flex: 1,
    alignItems: 'center',
  },
  tabText: {
    color: 'white',
    margin: 50,
  },
});
- 创建一个TabBarIOS组件实例,并添加两个TabBarIOS.Item标签,定制每个标签的样式以及点击方法。
export default class TabBarIOSDemo extends Component {
  constructor(props) {
    super(props);
    this._renderContent = this._renderContent.bind(this);
    this.state = {
      selectedTab: 'redTab',
      notifCount: 0,
      presses: 0,
    };
  }
  //更新界面显示内容
  _renderContent(color: string, num?: number) {
    return (
      <View style={[styles.tabContent, {backgroundColor: color}]}>
        <Text style={styles.tabText}>{num} 次刷新 </Text>
      </View>
    );
  }
  //界面组件配置与功能实现
  render() {
    return (
      <TabBarIOS
        unselectedTintColor="yellow"
        tintColor="white"
        barTintColor="darkslateblue">
        <TabBarIOS.Item
          systemIcon="history"
          badge={this.state.notifCount > 0 ? this.state.notifCount : undefined}
          selected={this.state.selectedTab === 'redTab'}
          onPress={() => {
            this.setState({
              selectedTab: 'redTab',
              notifCount: this.state.notifCount + 1,
            });
          }}>
          {this._renderContent('#783E33', this.state.notifCount)}
        </TabBarIOS.Item>
        <TabBarIOS.Item
          systemIcon='more'
          selected={this.state.selectedTab === 'greenTab'}
          onPress={() => {
            this.setState({
              selectedTab: 'greenTab',
              presses: this.state.presses + 1
            });
          }}>
          {this._renderContent('#21551C', this.state.presses)}
        </TabBarIOS.Item>
      </TabBarIOS>
    );
  }
}
- 使用import加载项目所使用的模块,并且注册组件TabBarIOSDemo成为整个应用的根容器。
import React, { Component } from 'react';
import {
  AppRegistry,
  StyleSheet,
  Text,
  View,
  TabBarIOS,
} from 'react-native';

AppRegistry.registerComponent('TabBarIOSDemo', () => TabBarIOSDemo);
- 在终端中执行下面的命令运行程序,在iOS模拟器中可以看到展示的TabBarIOS组件以及其中的两个标签,当我们点击某一标签时,屏幕显示的内容会更新。
react-native run-ios
